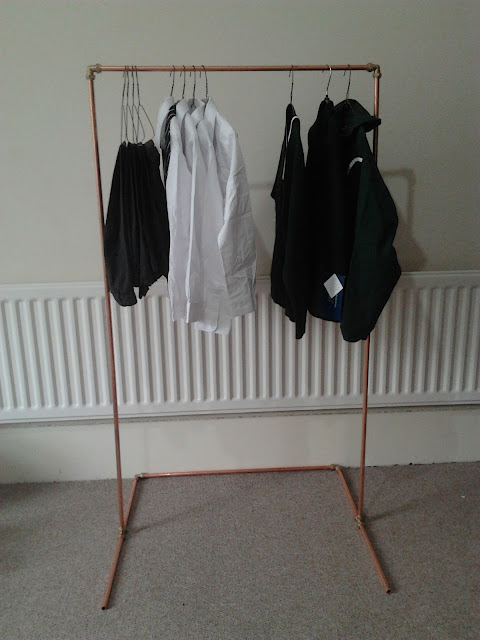
DIY Copper Pipe Clothes Rack
 |
| Image description: A clothes rail made from copper pipes and brass joints with clothes hanging from it. |
So I homeschool and it's working out really well, but decided to see if I could get my eldest son into a fancy lad secondary school. And he got in! I can give my kids a better-than-state-school education, but fancy lad schools teach Latin and shit, so I figured he could get a better education from them.
His school uniform cost more money than I have ever spent on clothing for all of my kids put together plus all of my own clothing since having kids! Probably more than that, but as you've probably gathered from reading my blog, I'm notoriously frugal, pretty savvy with money, and also like to buy secondhand as much as possible (cheaper and better for the environment, and you might find this surprising, but I also have better clothes now!). Sidestory: I was never a big spender, but really cut back when I was living in the Scottish countryside. The bus came once an hour and took an hour just to get to the nearest town. To get anywhere worth buying anything more than slightly overpriced groceries, you had to take a train from this town into Glasgow. Which took an hour. So, two hours each way. Buying most things was really not worth the effort!
So now that my son's wardrobe has quadrupled and he has many things that need to be hung, his wee chest of drawers was not going to cut it: he needed a clothing rail.
I didn't want to buy some cheap new thing that would fall apart. I could get him a proper old school wardrobe, but I'm not sure it's practical and it is hard to get bulky things up the narrow, steep stairs in our flat, so I decided to build one myself! Bonus points: it's recyclable!
Materials and tools:
6 meters of 15mm diameter copper pipe
4 compression elbow joints
2 compression t-joints
adjustable spanner
15mm pipe cutter
I cut the copper piping into the following pieces:
2x1.5m (these are the vertical side bars)
2x0.8m (these are the cross bar and the longer floor support bar)
4x0.35m (these make the shorter support bars)
I had 2 3-meter copper pipes, so I measured and cut the first one in half for the vertical side bars. I used the second one for everything else: the cross bar and longer support bar along the floor and the 4 equal-sized pieces that make up the shorter support bars.
In retrospect, I could totally have made this smaller and it would still have been great:
2x1.4m (these are the vertical side bars)
2x0.7m (these are the cross bar and the longer floor support bar)
4x0.25m (these make the shorter support bars)
So the assembly is easy and quick, just a bit fiddly. In retrospect, it might have been easier to do the corner joints first, but I didn't, so I'll go through what I did do:
 |
| Image description: a top-down-view of a brass compression t-joint with copper pipes inserted into the horizontal ends. The t-joint's bolts are unscrewed (and not shown) and the olives are showing. |
 |
| Image description: an angled view of a brass compression t-joint with copper pipes inserted into the horizontal ends. The t-joint's bolts are screwed in. |
I assembled the t-joints with 1x0.35m pipe coming out of either side and the 1.4m pipe coming out of the top. Compression joints are cool -- there is a ring inside (usually brass or copper) called an olive that slips over the pipe and fills the space between the pipe and the joint; as the nut is screwed into place, it compresses the olive onto the pipe, making a watertight seal (and keeping the pipe firmly in place). Top tip: make sure the pipe is as far into the compression joint as it can go before screwing on the nut.
Then I did the elbow joints (it is easier if you have someone hold the whole contraption up while you do this) -- I put them all together so the whole thing was assembled before I tightened all of the compression joints, just to make sure everything was in its right place.
The materials cost about £30 and the tools cost £13. The pipe cutter was a tenner, but it cuts perfectly and so fast!!
My next copper pipe project is going to be the shower curtain ring for my bathroom. Can you think of any other useful copper pipe projects?


Hehe. Hi CJ. I really like you solving your need that way: by your own!
ReplyDeleteThey say necessity is the mother of invention so, there it is.